Skip the expensive salon visits. With Nair™ Wax Ready-Strips, you can get professional-quality results at home for long-lasting, beautifully smooth skin.
Remove Hair with Nair™ Wax Strips
Nair™ provides four convenient, easy-to-use options for removing hair with wax strips.*.
1. Exfoliate at least 24 hours before waxing. Lightly rub your skin in a circular motion with a loofah or washcloth while showering. This step helps eliminate ingrown hairs. 2. Trim excess length. Make sure the hair to be waxed is no longer than a 1⁄2 inch in length. This makes waxing easier and helps reduce pain.3. Gather info and the supplies. Read the instructions in this guide (or on the product package) all the way through, and make sure you have everything you need nearby before getting started:
Damp washcloth or cold compress to help soothe any possible irritation
Baby oil or other fragrance-free, dye-free moisturizer
4. Test patch. Conduct a test patch on a small area at least 24 hours before you plan to wax. Slight redness after hair removal is normal, and it should naturally disappear after a few hours. Do not use the product if irritation persists.
New to waxing or need a refresher? Don't worry, we got you. Follow these waxing pro tips for successful hair removal at home.
Using Nair™ Wax Strips
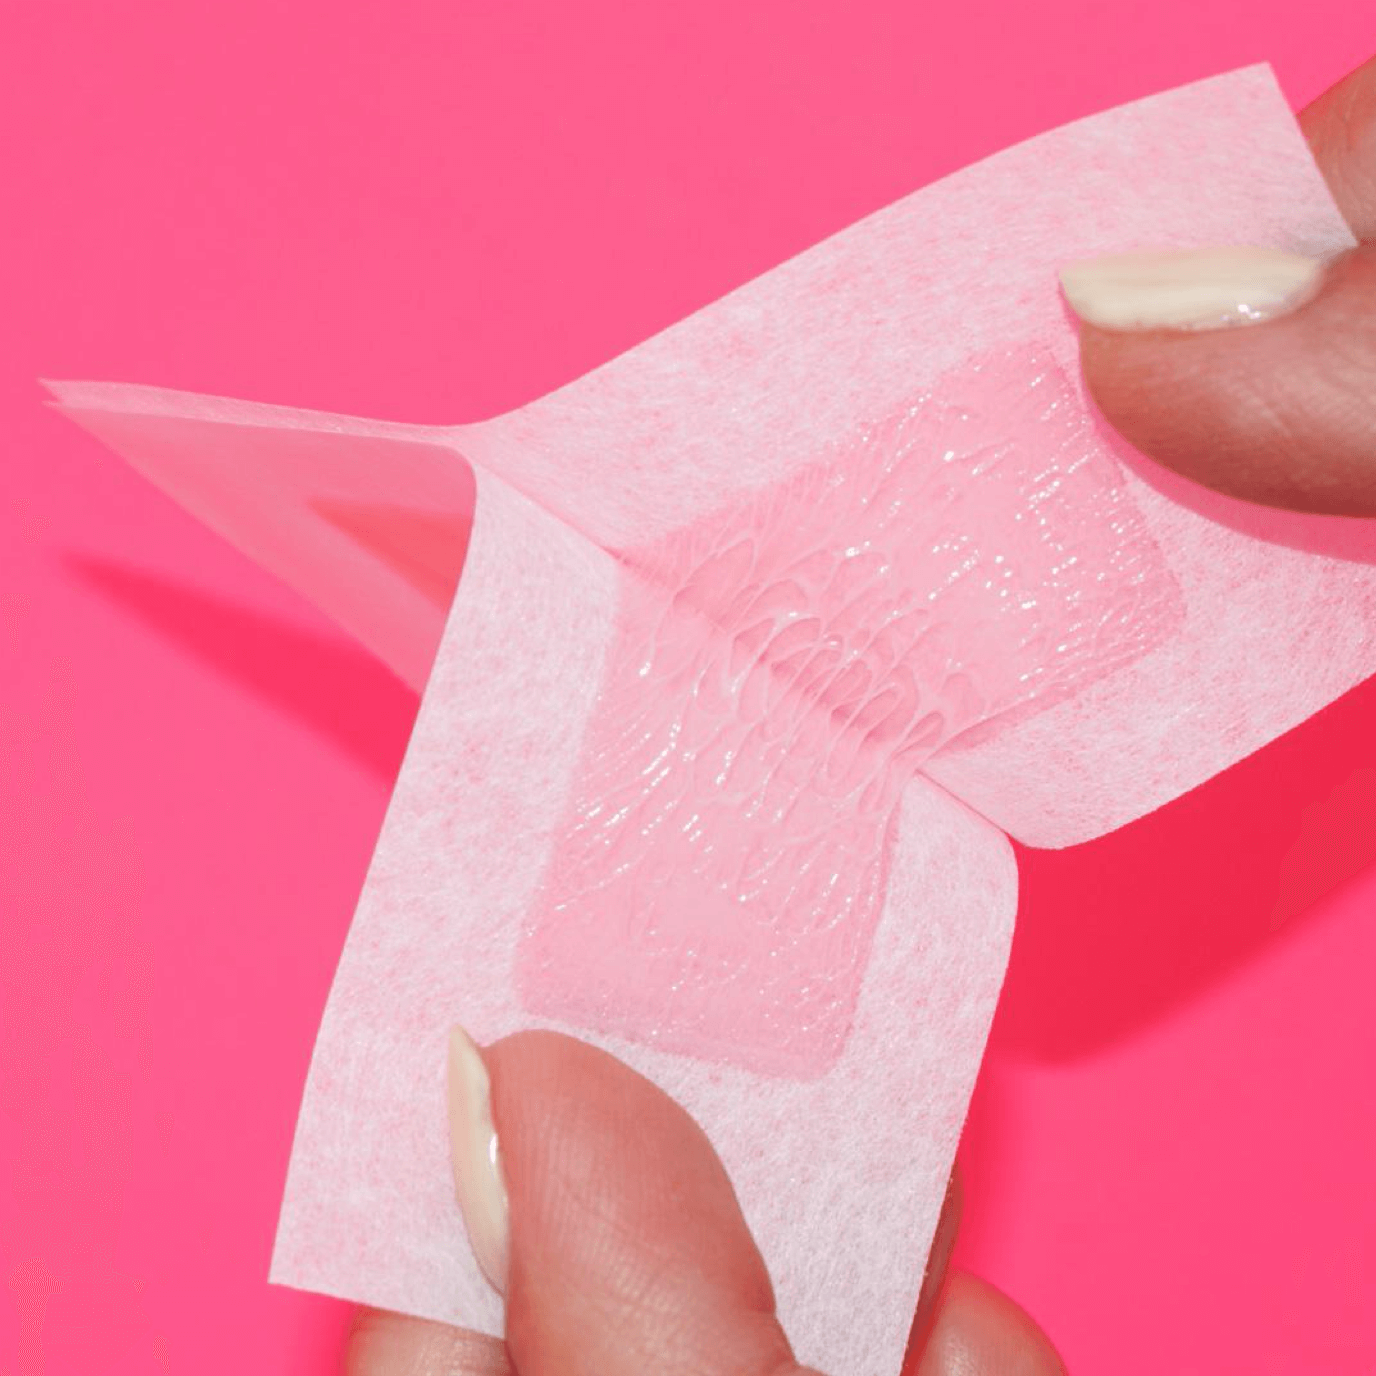
Nair™ Wax Ready-Strips are conveniently preloaded with wax so you can quickly and easily remove unwanted hair. No heating or rubbing is necessary.
1. Wax On - From Root to End
Separate the strips from each other slowly, and apply the waxy side to your skin, pressing down firmly in the direction of hair growth - from the roots toward the ends. Apply one wax strip at a time, and feel free to reuse it as long as it remains sticky.
2. Wax Off - From End to Root
Remove the wax strip immediately after application. Grab the edge of the wax strip, and pull it off with a quick motion in the opposite direction of the hair's growth - from the ends toward the roots. Be sure to hold the skin taut with your other hand while pulling the wax away.
Be lightning quick. Remove wax in one quick motion - like pulling off an adhesive bandage. Don't hesitate.
Work in parallel. Pull the wax off in a motion that is parallel to your skin's surface, rather than up and away which is perpendicular to the skin.
3. Repeat
Continue the wax-on-wax-off process until the entire area is hair-free.
4. Post Waxing Care
Use the post wipe provided in the wax strip kit or a fragrance-free moisturizer like baby oil to remove any wax residue that may be left behind and to soothe and moisturize your skin.
5. Maintenance
Waxing reveals ultra smooth skin that lasts up to 4 weeks.* To maintain beautifully smooth, hair-free skin, it's best to follow a regular waxing schedule. Hair also tends to grow back finer when waxed regularly. Nice!
Waxing Tips for Specific Areas
Successful waxing depends largely on applying the wax in the direction of hair growth and pulling it off in the opposite direction. But different areas of the body can present unique challenges. Here's a little area-specific know-how to get you through it with flying colors.
How to Wax Arms and Legs
For many people, leg hair tends to grow downward in the direction of knee to ankle. But arm hair tends to grow across the arm from inner to outer arm. Waxing each area according to its hair growth pattern will produce the best results.
How to Wax Your Underarms
When waxing your underarms, it's important to keep the skin taut for effective hair removal and to reduce pain. When removing the hair from your right underarm, hold your right hand behind the nape of your neck to keep the underarm skin taut. Do the same with your left hand when waxing your left underarm.Waxing your underarms requires two steps because the hair grows in two different directions (upward at the top nearest your upper arm and downward at the bottom which is nearest to the side of your torso).
How to Wax Your Upper Lip
Got a 'stache that's got to go? Conquering upper lip hair is easy when you divide the area into two sides and treat each side separately.
Apply the wax to your upper lip from the center point of your cupid's bow toward the corner of your mouth using a firm downward motion. Be careful not to get any wax on your lip.
Hold the skin taut at your cheek and then quickly pull the strip off in the opposite direction - from the corner of your mouth toward the center of your face.
Repeat the process for the other side.
If stubborn hairs remain in the center portion of your upper lip, the process can be repeated for the center alone. Cut a fresh wax strip to fit the center portion of your upper lip. Press the strip firmly to the area then hold the skin taut on both sides of your upper lip using your thumb and forefinger. With the other hand, pull the strip off quickly to one side.
How to Wax Your Eyebrows
Think sisters, not twins - no two eyebrows are identical. Who needs that kind of pressure anyway?
Eyebrow hair grows from the center of the face toward the ear.
To make shaping the lower part of your brows easier, cut a fresh wax strip into the shape of your arch and apply it in the direction of the hair growth (center of the face toward the ear) and remove it in the opposite direction.
Eyebrows are detailed work and there may be a few hairs left behind after waxing. Simply tweeze the stragglers away.
How to Wax Your Cheeks and Chin
Peach fuzz and 5 o'clock shadows be gone! Wax should be applied from your cheekbone in a downward direction, and as always, removed in the opposite direction.How to Wax Your Bikini/Pubic Area
Choose the shape you want for this oh-so-sensitive area. Using a favorite bikini or underwear bottom as a template can be a great place to start.
The direction of hair growth in this area for many people is from outer to inner thigh.
How to Wax Chest and Back Hair
Exfoliation is essential when waxing, and even more so for the chest and back hair because these areas can be especially sensitive to ingrown hairs.
The larger the area being waxed, the more potential for irritation. Keep a cold compress handy to minimize discomfort.
To wax back hair, go ahead and enlist the help of a friend or partner.
Other Options for Hair Removal
For more information on hair removal options, see our Hair Removal Guide and these area-specific guides.
With Nair™ Wax Strips and a little know-how, you can achieve long lasting, smooth skin with professional-style results at home. Go ahead and free your most beautiful self!*Individual results may vary.